Finnish handknitted socks
Poista suosikeista
Lisää suosikkeihin
29.7.2016 - Tekijä: Siivonen Minna
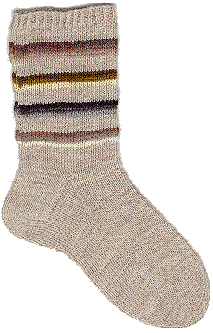
The traditional hand knitted socks
- It doesn't have a so called 'strengthened' heel. So using a polyamide strengthened wool yarn is advisable.
- Suggested knitting needle size usually comes with the yarn but this size is suitable if you are knitting a sweater. For socks one size smaller is better.
First knit a sample:
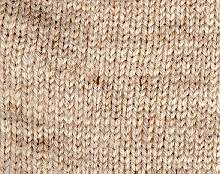
- Cast 20 stitches and knit about 5 cm of plain knitting.
- Count how many stitches there are on 5 cm horizontally.
- Multiply the amount with 2 to get the amount of stitches in 10 cm.
- Divide the result with ten to get the exact amount of stitches in 1 cm.
- Measure the circumference at the ball of your foot.
- Multiply the circumference with the amount of stitches per cm.
The amount of stitches should be considered:
- Decimals should be rounded to whole numbers.
- If you are planning on ribbed or patterned stitches they have to fit exactly into the amount of stitches.
- Cast the stitches straight onto four knitting needles and knit the ankle as a circle.
THE HEEL FLAP
- Divide the stitches evenly onto four knitting needles.
- The heel flap is knitted with the stitches of the 1. and 4. needles. knit the stitches on the 1. needle onto the 4. needle. (After this you can change the color or the style)
- Turn the piece over.
- Start the heel by stitching a purled row.
- Knit plain knitting.
- On every row, lift the 1. stitch without knitting it (when starting the purled row, lift from the right, when starting the plain row, lift from the left).
- Continue with plain knitting until there are 2 - 4 rows less in the heel flap as there are stitches in it (or until the heel flap reaches your sole when you try the sock on).
Finally knit a plain row.
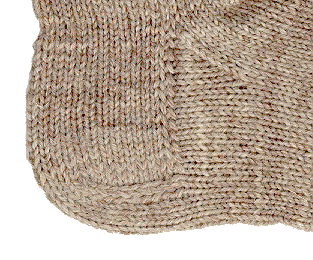
THE BOTTOM OF THE HEEL
- Divide the stitches of the heel flap into three groups with marker yarn. If they don't go even put the extra stitches in the middle group.
- Start the bottom of the heel with a purl row (lift the 1. stitch without knitting it).
- Knit the side stitches (= the 1. group) and the middle stitches excluding the last one.
*Decrease the last stitch of the middle group and the first stitch of the side group. - Turn it over.
- Lift the 1. stitch without knitting.
- Knit the stitches of the middle group excluding the last one.
- Knit the last stitch in the middle group and the 1. in the side group: lift one stitch, knit the next one and pull the lifted one over the stitched one.
- Turn it over.
- Lift the 1. stitch without knitting.
- Knit the stitches in the middle group excluding the last one.*
Repeat *__*, until all the side stitches are done. The last row is plain, only the middle group is left.
DECREASE OF THE FOOT AND THE STRAIGHT PART OF THE FOOT
- Lift the large stitches on the sides of the heel flap onto the knitting needles.
Keep the right side of the sock towards yourself and lift the stitches with the needles.
Lift the same amount of stitches from both sides. - Lift 1 - 2 extra stitches from between the needles 1. and 2., and 3. and 4. to avoid any holes.
- Needles 2. and 3. remain the same (they have the original amount of stitches).
- Divide the remaining stitches on needles 1. and 4.
- Knit one row plain. Make sure that you knit the lifted stitches twisted.
- Start the decreasing:
- Knit two together at the end of the 1. needle
- And knit two together at the beginning of needle 4.
- Decrease every second row until you have the original amount of stitches on every needle.
Keep knitting (smooth or whatever you planned) until your little toe is covered.
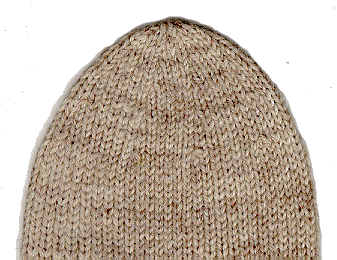
TOE DECREASE
- Divide the number of stitches in two and decrease the two last stitches in each group together.
(EXAMPLE: if there are 12 s, decrease 5. and 6. together and 11, and 12 together.) - NOTE! If you have an uneven amount of stitches, first make an exception with the decreasing row:
Knit the last two stitches on every needle together.
Then knit one normal row before decreasing). - Between the decrease rows there are always as many plain rows as there are stitches between decreases.
(EXAMPLE: If there are 12 s, there are 4 s between decreases so there are 4 plain rows.) - Keep decreasing until there are two stitches on each needle.
- Cut the yarn and pull it through the stitches.
Finish off and iron the socks with steam.
Compiled by Minna Siivonen. We are grateful for all feedback on the subject
© 2024 Tekijät ja Käsityö verkossa Ry
Punomo.fi:n opetus- ja kaupalliseen käyttöön vaaditaan lisenssi. Lue lisää!


